Total Pro Sports - Toronto seems to be a hot spot for Alex Rodriguez. Last time he made headlines in the great Canadian city, it was for his extra-marital affairs with a hot blond at a local strip club. This time he stayed away from the titty bars, and even the hot blond (not Kate Hudson or Madonna), as it was a dark-haired Toronto police officer that he had his eyes on.
During last night's game between the Jays and the New York Yankees, a pop-up off the bat of Lyle Overbay was drifting towards the stands on the third base side. ARod made his way towards the area in an attempt to record the out.
Although he could not get a piece of the ball as it trailed off into the stands, he did manage to get himself a piece of something. That something was one of the city of Toronto's finest (cops, that is).
Reaching the warning track, he lunged, but missed the ball, unintentionally groping the female police officer sitting against the stands – not once but twice. For the first time in years, Alex Rodriguez was cheered good-naturedly at the Rogers Centre.
"I'm just glad she didn't read me my rights," Rodriguez said. "Only me. My God, how embarrassing." [Toronto Star]
ARod and Johnny Damon would end up checking on the woman in uniform and she would be alright. No word yet, but it doesn't seem like Rodriguez took her out afterward for some drinks to celebrate the 10-5 victory at The Brass Rail (a fine Toronto strip club).
Here is how it all unfolded.
ARod grops female officer
ARod grops female officer
After the groping
Hat Tip Pics - [Blitz Corner]...check them out for the rest of the pics.
Royal Falcon Fleet RFF135 Catamaran by Porsche Design – Click above for high-res image gallery
Sure, cars like the Cayenne and even the Panamera are enormous in comparison to the 911. But there's still only so big Porsche can go. That is, on land at least. Not one to be told to stick to its core business, Porsche's design arm has teamed up with a Singapore shipyard to design a state-of-the-art catamaran megayacht.
We first reported on the RFF135 by Porsche Design and Royal Falcon Fleet back when the idea was announced, but now that the project has started to materialize, the two companies have begun releasing details and images. Worlds apart from the speedboat which Porsche Design penned for Fearless, the RFF135 is a massive twin-hull design measuring 135 feet in length (hence the name) with a 41-foot beam. That's enough space to accommodate 10 guests and 10 crew members below decks in 472 square meters of area, with another 208 square meters of deck space up top.
That's almost unfathomably large, and to propel the vessel up 35 knots (about 40 mph), the catamaran will be equipped with twin V16 turbodiesel engines from German manufacturer MTU, each producing a massive 4,600 horsepower. Don't ask about miles per gallon – this puppy will drink down 750 liters of diesel every hour, but at least you're bound to look damned good doing it, right? Details in the press release after the jump and renderings in the gallery below.
Reaching the first milestone of construction of the Royal Falcon Fleet RFF135 Keel laid for revolutionary power catamaran
Bietigheim-Bissingen/Singapore. The Porsche Design Group and Singapore-based megayacht builder Royal Falcon Fleet have reached the first milestone of the construction of the RFF135. The first joint project for the two companies, it is a luxurious anomaly on the water: a power catamaran with a length of more than 40 metres. The outer hull and the interior are in keeping with the functional, timeless and puristic hand of the Porsche Design Studio at Zell am See (Austria), which was responsible for the styling.
The appearance of the RFF135 is particularly extraordinary, as it was conceived as a "spacecraft on the water," as was requested by the customer. In this form, the catamaran platform offers completely new possibilities for configuration in exterior and interior design. Unlike a great number of mega-yachts, the interior was styled in a highly modern way and captures the dynamic contours of the hull.
Its typical Porsche design is unmistakable: Luxurious and functional, it dispenses with floridness and opulence of any kind. On the contrary, an unadorned design and authentic, premium and comfortable materials constitute the flair of the interior. The generous impact of its space goes beyond established standards for a 135-foot (41.2 metre) yacht.
After the successful completion of the development phase, the construction of the hull for the first RFF135 began in September 2008. At the end of the year, the hull will be relocated to Sweden, where the technological installations and interior fit-out will be carried out. Royal Falcon Fleet has engaged the Kockums and the Incat Crowther firms for the construction design of the catamaran. Kockums, a Swedish subsidiary of Thyssen-Krupp, is known for leading-edge technology in the area of marine technology. The Australian-based shipbuilding engineers of the Incat Crowther firm have decades of experience in the construction of large power catamarans. The launch of this first Royal Falcon Fleet power catamaran designed by Porsche Design is planned for the fourth quarter of 2010.
"In 1987, we designed the 'Kineo' power yacht, an exclusive speedboat, of which there are only three examples worldwide and which drew attention for its characteristic dolphin form," says Dr. Jürgen Geßler, CEO of Porsche Design Group. "Our newest project once again demonstrates that our design, outstanding in many ways, is setting trends in numerous fields. With the first Royal Falcon Fleet yacht, we are building a bridge to the Porsche Design Sport textile collection that was developed specifically for the maritime area."
"We have now reached an important milestone in mastering this path-breaking project," says M. A. Zaman, president and CEO of Royal Falcon Fleet. "Under the guidance of highly qualified experts from Australia, France, Sweden and the U.S., we are constructing the hull of the RFF135. On December 15, 2009, it is going from Asia to Sweden, where it will be completed. And at the end of 2010, the first Royal Falcon Fleet will be launched – the ultimate luxury experience at sea.
"In many respects, this project is an anomaly," says Roland Heiler, executive director of the Porsche Design Studio at Zell am See. "The sole requirement from Royal Falcon Fleet was to implement contours outside of the stereotypical boat aesthetic. This gave us considerable creative latitude and the result was a revolutionary design – a real challenge for the ship architects. This innovative yacht concept quickly drew them into its thrall, however, so that all the participants are now working painstakingly on the realisation of the design."
Royal Falcon Fleet Plc. Royal Falcon Fleet, a Singapore-based builder of luxury yachts, was founded by a Swedish investor. The goal of the firm is to develop mega-yachts that stand out for their innovative design, cutting-edge technology, and handcrafted European interiors.
Porsche Design Group The Porsche Design Group, based in Bietigheim-Bissingen, is a majority-owned subsidiary of Porsche AG in Stuttgart. The activities of the company are concentrated on the company divisions Porsche Design, Porsche Design Driver's Selection and the Porsche Design Studio at Zell am See in Austria.
Porsche Design Studio The Porsche Design Studio at Zell am See, Austria, stands for the clear, timeless, unmistakable design signature that distinguishes all products of the Porsche Design Group. Moreover, the studio also handles industrial and product design for other companies. The Porsche Design Studio is one of the most renowned design houses in Europe.
Technical data Royal Falcon Fleet RFF135 Total length: 135 feet (41.2 metres) Length at waterline: 114 feet (35.7 metres) Breadth: 41 feet (12.5 metres) Draught: 5.6 feet (1.7 metres) Engine: MTU 16V 4000 M93L Power output: 2 x 3,440 kW (4,600 HP) Speed: 35 knots Range: 2,000 nautical miles at 30 knots Fuel consumption: 750 litres per hour Tank capacity: 2 x 25,000 litres Freshwater reservoir: 5,000 litres Waste water reservoir: 2 x 4,000 litres Classification: Lloyd's Register Material: certified, high-strength aluminium Form: High-speed catamaran hull Interior deck area: 472 square metres Exterior deck area: 208 square metres Passenger capacity: 10 guests and 10 crew
The prisoner, who cannot be identified, won a human rights battle against Jack Straw, the Justice Secretary, that keeping her in a male prison was a violation.
Lawyers for the 27-year-old inmate, who is still at the preoperative stage, described her as a “woman trapped inside a man’s body” and argued keeping her among men was preventing her from having a full sex change.
She will be moved to a women’s jail within weeks following the High Court ruling but the Ministry of Justice warned it will cost taxpayers an extra £80,000 a year because she will have to be kept in segregation.
The entirely publicly funded case will also have cost tens of thousands of pounds.
The killer, known as “A”, is currently serving life for the manslaughter of a boyfriend and the attempted rape of a female shop assistant, both committed while she was man.
Although born a man, she had been undergoing the process of gender reassignment, and in 2006 was granted a certificate under the 2004 Gender Recognition Act which required her to be recognised as a woman "for all purposes".
Her birth certificate has been changed to say she is a female, while hair on her face and legs has been permanently removed by laser and she has developed breasts after hormone treatment.
She is allowed to shower in private, launder her female clothing herself and has access to cosmetics.
However, she was forbidden from wearing skirts or blouses, or more than "subtle" make-up, at the men's prison where she was being held on a "vulnerable prisoners" wing.
The court heard that in order to complete her change to full womanhood, she must live for a time as a woman and that could only be achieved if she was moved to a female jail.
Deputy Judge David Elvin QC, sitting at London's High Court, quashed Mr Straw's decision to continue detaining "A" in a male prison saying it breached her right to a private and family life the European Convention on Human Rights.
He said: "It follows that, so long as the claimant remains within the male prison estate, she is unable to progress towards the surgery which is her objective."
The judge said the Ministry of Justice had recently produced a draft Prison Service Order (PSO) to give guidelines on managing gender dysphoria cases, but final approval had been delayed until the result of A's case was known.
He ruled that far greater restrictions were being imposed on A than would be the case in a female prison - "I doubt that similar restrictions would apply in the rare case of a biological woman held in a male prison".
The prisoner, dressed in a dark blue blouse and striped jacket and wearing gold earrings, listened by video link.
She was originally convicted of manslaughter in 2001 and jailed for five years after smothering her boyfriend with a pillow and strangling him with a pair of tights.
She says that, although at first accepting of her gender dysphoria, he moved to hostility when she became increasingly feminised and she lost control after a row.
Less than a week after her release on licence two years later, "A" attacked a shop assistant, forcing her into a back room, tied her up with a suspender belt and tried to rape her.
She was given a life sentence for that offence under a "two strikes" system following the manslaughter conviction.
Her legal team said the attempted rape was closely linked to her obsession with becoming a woman and her intense frustration at the authorities' refusal to help her qualify for full gender reassignment surgery.
In July 2007, the Parole Board refused her release because "the risk to life and limb" were too high.
Phillipa Kaufman, A’s barrister, said: “So long as she stays in the male estate, she has no hope of realising her desire to become fully a woman.
"There is absolutely no security reason why she should be kept where she is. If she remains in the male estate, she is looking at the bleakest future in terms of what matters to her.
"What she would have in the female estate is hope; hope that she will be able to live in role and persuade her doctors that she should have gender reassignment surgery."
A Ministry of Justice spokeswoman said: "We contested this case and are disappointed at the judgement. We are studying it carefully and will consider whether to appeal."
The Nintendo 64 was Nintendo's third home console and featured one of the most baffling controllers of all time.
Charles Darwin would be proud of this evolutionary discovery
Just The Facts
The Nintendo 64 was Nintendo's first console to feature 3D graphics.
Many classic video games were developed for it.
The controller is one of the worst-designed things, ever.
Seriously, how the fuck do you hold it.
Cracked on Nintendo 64
Released in 1996 after the big success of 1991's SNES, the Nintendo 64 was actually late to the market. Most consoles do have a lifetime of around 5 years, but Nintendo was late to the game when Sega's Saturn and Sony's PlayStation hit the market in late 1994. It did make up for late time by featuring such classics as:
PIctured: Super Mario 64, Ocarina of Time, Banjo-Kazooie, Donkey Kong 64 and... wait, what the fuck is that? Glover?
However, the Nintendo 64 featured an all new, revolutionary controller interface: the analog stick. Yeah, you know that little stub that moves around? You saw it here first. While developing 3D game environments, Nintendo found that the traditional D-pad (also invented by them) didn't allow for precise control, so they decided to forever change the course of gaming history to allow for slightly more accurate movement.
Even though the new analog stick was quite a step forward, it also had the distinction of being "first," meaning it was shit compared to later analog sticks. Because it was made out of hard plastic, using it too much could really hurt your thumb and after playing a lot, it would become loose in the socket. But come on!
Nintendo's controller seems to be designed for an octopus.
The analog stick has since been featured in pretty much every other major game controller that has been released since. In fact, the analog stick was so revolutionary at the time that many game-publications rewarded Nintendo's games such as Super Mario 64 and Majora's Mask some of the highest praise ever received, by anything. You thought Dark Side of the Moon was a good album? That Goodfellas was a great movie? Super Mario 64 was way better. The game was recently listed by IGN was the fifth greatest game ever created, surpassed only by other Nintendo games and Tetris. Super Mario 64 was heralded for its tight integration with the analog stick and for staying true to the series roots, even though it made the transition from 2D to 3D. Super Mario 64 was also the first time millions of gamers heard their beloved Mario speak:
The pure magic of seeing Mario in glorious 3D with an actual voice was actually too much for some fans to handle, and they became victims of Shitmypantsilitis; a condition that befalls people that get too excited about Nintendo-related products. It was still a really fun game.
Another one of the Nintendo 64's bizarre features was that it ignored the CD-media trend. So, unlike the more-successful Sony PlayStation, which had its games written onto a disc, Nintendo decided to stick with the extremely dated cartridge format after this lengthy corporate discussion:
Ex-Nintendo President Hiroshi Yamauchi's most successfull business strategy
Sticking to the cartridge format was seen as a mistake by others. Cartridges were more expensive to produce than CDs and held less storage, meaning they could only accommodate shorter games or worse graphics. The upside to cartridges is that games load faster and you'll look like a jackass in front of your friends when you have to blow on the bottom to get it to work properly.
Other innovations the N64 offered were then-state of the art 3D graphics. At the time, the 64's 64bit (yep) framework allowed for more precise polygon counts to shape 3D models more effectively than Sega's Saturn and Sony's PlayStation. But remember, this was 1996. These were considered amazing graphics:
Wait, that's not... oh never mind.
The Best Nintendo 64 Game
With the Nintendo 64's legendary five year-run, many classic games were released for the system and many consider the console to be home to the single-most amount of great exclusive games ever. Some games were so well received by fans that they simply stopped buying new consoles after the Nintendo 64 and continue to play them to this day. These people are referred to as fucking losers. Anyways, the contenders:
Super Mario 64
Legend of Zelda: Ocarina of Nerdgasms
GoldenCock 007
You know what? Fuck those games. They may have been great and all, but there is one clear winner here. A game that transcends fun into an entire new realm of enjoyment and redefines immersive experience. This isn't just a game, it is a shining example of why mankind was put on this earth. This game is perfection.
OK, that was weird. A serious wave of rare nostalgia just hit when I watched the first new Beavis and Buttheadanimation in, well, not really all that long. Looking around I see that Mike Judge’s animated duo have popped up on MTV now and again for the Music Video Awards and stuff like a Jackass marathon. But if you’re like me and tend to avoid most of what airs on MTV in the last decade this might be like a little trip down memory lane. Check out Beavis and Butthead shilling for Extract after the jump.
Mike Judge has called Beavis and Butthead his favorite creations, and that affection shows through in this clip. How could two morons be so endearing? (By not being quite as one-sidedly moronic as they first appear, as with so many Judge characters.) The idea here is that the pair are setting up a clip from Extract, in which Jason Bateman and wife Kristen Wiig have a tense little conversation about the quality of their new pool cleaner’s work.
That being the case, this is a spoilery clip, but only if you haven’t been watching and reading the other clips and interviews that have shown up to promote the film. If you’ve caught all that then there will be no real surprises. You’ll be able to safely enjoy the amazement expressed by Beavis at the fact that a movie featuring a chick with big boobs, a dude getting paid to have sex and some other stuff costs just the same as every other movie.
For what it’s worth, I liked Extract quite a bit, too. Perhaps my expectations had been lowered a bit (I’d heard some middling reactions over the last couple weeks) but I thought it was consistently funny and smart. Look for a review (either from me or Hunter; we both saw it) later in the week.
Well, the New York Post earned its fifty cents today. Let's start with the cover, which at first glance seems like a work of fantasy but actually documents a real-life, tough-talking rabbi and his plastic pistol-packing "God Squad." Jewish security forces are hardly new to New York (Hasidic communities like the Satmar Jews in Williamsburg have their own private patrols, for instance), but none have produced a training video as uplifting as this one. A mix of Wes Anderson, Adam Sandler, and the "Sabotage" video, it depicts Rabbi Gary Moscowitz, who was an NYPD cop for nine years and holds a black belt in karate, training his fellow Jews to defend their synagogues. Enjoy!
Moscowitz is founder of the International Security Coalition of Clergy, whose mission is to train Jews in self-defense and advance fighting techniques in the event of a terrorist attack on a synagogue. He says business was slow for his Coalition until May, when the FBI arrested a group accused of plotting to blow up synagogues in The Bronx. But now Moscowitz's 100-hour synagogue self-defense course is in high demand. With his course, you'll learn how to:
execute a somersault while drawing a gun
use a table as cover from gunfire
take down a terrorist by the neck
Moscowitz tells the Post, "Jews are not like Christians. If I turn my cheek, I'm coming around to make a kick." The rabbi says the NYPD isn't qualified to guard synagogues because they don't know members of the congregation, so they can't stop a terrorist who wants to put "a yarmulke on, say, 'Happy holidays,' and blow the place up." NYPD spokesman Paul Browne says Moscowitz was fired from the force in the early 1990s, but claimed not to know details. Regarding the Rabbi's criticism of the NYPD, Browne cryptically added, "Blessed are the tight of lip, for they shall resist speaking ill of the ill-informed."
Two years ago, I detailed how to build a Hackintosh for under $800—then covered how to do the same with less hacking. Now that Snow Leopard's out, we're revisiting the Hackintosh, building a Hack Pro from scratch for roughly $900.
For folks eager to try a Mac but never wanted to plunk down the high price tag to get it, the Hackintosh—that is, a regular PC tweaked to run OS X—has always been an attractive option. That said, it's not something you should take on lightly unless you're willing—even enthusiastic—to build and maintain a PC entirely from scratch. I can't guarantee it'll be easy, but if you follow this guide step-for-step (it's exhaustive) and stick with the same (or at least roughly the same) hardware as I am, I can vouch for a rock solid system that also happens to cost a good deal less than you'd pay for a comparable Mac.
Price Comparisons
Most Hackintosh enthusiasts will say you shouldn't build a Hackintosh primarily to save money, as it's more than just an insert-disc-and-click install. Still, I always enjoy looking at the price differences between my Hackintosh and Apple's current offerings. At the moment, the cheapest Mac in the Apple store is a Mac mini sporting a 2.0GHz Core 2 Duo processor, 1GB of RAM, and a 120GB hard drive. For $300 more, I'm running a 3.0GHz Quad-Core processor, 8GB of RAM, a 1TB hard drive, and a damn saucy video card. I could have made this build much cheaper by skimping on hardware and still ended up with a great little machine, but I liked aiming for around the $800 price point from my last build—plus I really wanted to make it fly.
The most expensive iMac, by comparison, has only a 3.06GHz Core 2 Duo with 4GB of memory for $2,200 ($1,300 more than my build, but it is built into a monitor), while the cheapest Mac Pro has a single 2.66GHz Quad-Core processor, 3GB of RAM, and a 640GB hard drive—and it costs $2,500 ($1,600 more than mine, though it's a different and better processor and DDR3 rather than DDR2 RAM). In short, my $900 "Hack Pro" sports nearly as good or better hardware than any Mac that Apple sells short of the $3,300 8-Core Mac Pro (which can, incidentally, get more expensive, but it won't get much better).
The Hardware
You can find plenty of hardware capable of supporting OS X on a Hackintosh—there's no definitive build—but we're not going to go into that here. I've put together a list of hardware that I'm using and that I can guarantee will (or at least has) run Snow Leopard like a dream.
To make it easy, I've created my entire build as a wishlist over at Newegg. Unfortunately, Newegg's not cooperating with me when I try to make it public right now, so here's a link to everything I bought:
10/ 100/ 1000/ 2000Mbps PCI Copper Gigabit Network Adapter (The motherboard has onboard Ethernet, naturally, but this particular board has some problems with onboard in the Hackintosh world. Luckily, Ethernet cards are extremely cheap.)
The Build
Rather than detail every step necessary to put the actual pieces of your new computer together (this guide already reads like the Bible as is), I'm just going to point you to our first-timer's guide to building a PC from scratch. Do your building, make sure everything's booting up as it should be (i.e., you can boot the computer to the point where it does nothing, because you have nothing installed on it), then let's move on.
What Else You'll Need
Assuming you've purchased all the necessary parts for your build (linked above), you'll still need a few other things before you get started:
A USB thumb drive that's at least 8GB in size (I'm using this 16GB Corsair drive, but obviously any sufficiently sized thumb drive should do just fine.)
A copy of the Snow Leopard Install DVD. You can use the $29 "Upgrade" disc to install, even though this is a fresh installation. Note: If you feel like being completely honest, go ahead and buy the Mac Box Set—though, honestly, Apple's practically made it hard *not* to buy the fully functional install disc.
Another Mac to do some Terminal work on. (You'll only need this other Mac for a few steps. I used my MacBook Pro, but you could also borrow a friends for an hour or so, too.)
Step One: Prepare Your Thumb Drive
We're going to be installing Snow Leopard to your Hackintosh from your thumb drive rather than from the Snow Leopard install DVD, since in order to run the installer on your PC to begin with, you'll need to slightly customize the way the installer is loaded. (More specifically, we'll be loading a custom bootloader onto the thumb drive that will make booting into the install work like a charm.*)
So first things first: You need to format your thumb drive and then turn your Snow Leopard install disc into a disk image on your desktop. Here's how to do it:
Launch the Disk Utility application on your borrowed Mac (located at /Applications/Utilities/Disk Utility)
Format and partition your thumb drive: Insert your thumb drive; after a second, it should show up in the Disk Utility Sidebar. When it does, (1) click on it, then (2) click on Partition. (3) Choose 1 Partition from the Volume Scheme, (4) give it a name (I called my HackintoshInstall) and select Mac OS Extended (Case-sensitive, Journaled) from the Format drop-down. Now—and this is important—(5) hit the Options button and make sure GUID Partition Table is selected as the partition scheme. Once you've made sure to set all the appropriate settings, just (6) click Apply and Disk Utility will get to partitioning your thumb drive.
Copy the Snow Leopard Install DVD image to your hard drive: In the following step we'll be turning your thumb drive into a Snow Leopard Install drive, but before we do that, we need to get the installer off your DVD and onto your hard drive. To achieve this, insert the Snow Leopard DVD. When it shows up in the Disk Utility sidebar, (1) click on it, then (2) click New Image in the Disk Utility toolbar. Choose where you want to save it (for the sake of convenience, I put it on my Desktop), then click the Save button. Now go grab yourself a cold drink. This will take some time. When it finishes, move on to the next step.
Restore the Snow Leopard Install disk image to your thumb drive: Now, in Disk Utility, (1) click on HackintoshInstall (or whatever you called your partitioned thumb drive) and (2) click on Restore. (3) Drag and drop Mac OS X Install DVD.dmg from the sidebar to the Source field, then (4) drag and drop your thumb drive from the sidebar to the Destination field. Now simply (5) click on Restore and enter your password when prompted. Disk Utility will take everything on the Snow Leopard Install DVD and restore that image to your thumb drive—since, like I said above, we'll be installing Snow Leopard from our thumb drive instead of the DVD. Again, go grab yourself another drink; this will take a few minutes. When it finishes, your thumb drive has basically been turned into a Snow Leopard installation drive.
As I said earlier, the thumb drive needs a little finesse before you can boot the Snow Leopard installer on your PC hardware; let's apply that finesse now.
Warning: Semi-heavy Terminal work ahead. It's not that difficult, and I've gone into a lot of detail to make it as easy to follow along as possible, but if you're not at least a little comfortable with the command line, it may make you pretty uncomfortable. Beg or borrow a command line geek for an afternoon, if needed.
Make sure your thumb drive is still plugged in, open Terminal (/Applications/Utilities/Terminal) and type in:
diskutil list
We're interested in two pieces of information here. The first is the root identifier for your thumb drive (mine looks like disk2, as you can see in the screenshot). The second is the specific identifier for the portion of the thumb drive that contains the Snow Leopard installer. (Again, see the screenshot.) In my case, the first is disk2 and the second is disk2s2. Yours may vary depending on how many disks are on your system. Copy your identifiers down somewhere. We'll need them later.
Head to the Chameleon homepage, find the Latest Releases section of the site's sidebar, and download the latest version of Chameleon. (As of this writing, it's Chameleon-2.0-RC2-r640.) Uncompress the download and move the Chameleon folder to someplace that's easy to access. I'm putting it on my Desktop.
Now, in Terminal, cd to the i386 folder of the Chameleon folder. On my Mac, the command looks like this:
(1)
cd /Users/adam/Desktop/Chameleon-2.0-RC2-r640-bin/i386/
Yours should look similar if the Chameleon folder is on your Desktop, except your username should replace mine. (Quick shortcut: In Terminal, type cd , then drag and drop i386 folder inside Chameleon-2.0-RC2-r640 to Terminal.) Hit Enter.
You're going to be running a couple of Terminal commands that will use Chameleon to make your thumb drive friendly to booting up the OS X installer. They are, as follows:
(2)
sudo fdisk -f boot0 -u -y /dev/rdisk2
IMPORTANT: On your computer, replace rdisk2 with whatever you copied down above. In my case, the thumb drive's root identifier was disk2, so /dev/rdisk2 is as it should be.
After you type in that command and hit Enter, you'll need to enter your user password to execute it. Do so, then execute the following command, again paying special attention to the disk identifier we took note of above:
(3)
sudo dd if=boot1h of=/dev/rdisk2s2
IMPORTANT: As I noted, my Snow Leopard partition was disk2s2, so that command is right for me. You should replace the disk2s2 portion of the command with whatever you noted as the portion of your thumb drive that contains the Snow Leopard installer.
Now we're going to place an awesome, custom EFI bootloader on your thumb drive that lets us load into the installer (and into Snow Leopard in general). So first, head over to netkas.org and download the bootloader from the bootloader link. Make sure you download it somewhere convenient. (Again, I've just downloaded it to my Desktop.)
Now head back into Terminal, where we're going to copy the boot file to your thumb drive. (One might think that you could just do this using Finder via drag-and-drop, but in this case, doing it via Terminal is necessary.) So, in Terminal, your command should look similar to this:
The easiest way to do this is simply type in sudo cp , (1) drag and drop the boot file into Terminal, then (2) drag and drop your mounted thumb drive from the desktop into Terminal. (The drag-and-drop method is a quick Terminal trick that pastes the full path to each file or directory.) After that, simply hit Enter. (Enter your password if necessary.)
I know it seems like we've already run a marathon, but you've got one last step and then it's relatively smooth sailing from here on. Download Extra.zip, unzip the file, and then drag and drop the Extra folder into your thumb drive. Nothing fancy, a simple drag and drop with your trusty old mouse will do. Once you've done that, open up your thumb drive and verify that it looks something like the screenshot below. (Notice the Extra folder, the boot file, and the OS X installer.)
Take a deep breath. By this time, you've completed all the hard work. Now it's time to boot up your machine, tweak your BIOS settings so they're ready for your OS X install, and then it's smooth sailing.
Step 2: Set Your BIOS
Before you can boot into or install OS X on your Hackintosh, you've got to make some small adjustments to your BIOS. Rather than taking you step by step through every change you need to make, I've simply snapped a picture of the relevant BIOS screens and added some notes. Just click through these images and make sure your BIOS settings match up.
If you've made it this far, the hard part is over. Now it's time to install Snow Leopard, which—unlike what we've done so far—is extremely easy.
Make sure you've set the boot priority in your BIOS to boot from your thumb drive (you can see how in this pic), then simply plug your prepared thumb drive into your Hackintosh and power it up. Since screenshots aren't really an option—and since it's a fairly easy process—my install instructions come in video format:
The quick version goes like this: Boot into the Snow Leopard installer, format the hard drive you want to install Snow Leopard to (go to Utilities -> Disk Utility, then click on the drive, select 1 Partition, Mac OS X Journaled (Case-Sensitive), give it a name, and make sure GUID Partition Table is set in the Options. After you Apply the new partition, go back to the installer and install like normal to that drive. When you reboot after the install completes, press the arrow keys at the graphical boot menu and select the drive you just installed Snow Leopard to.
A Few Final Tweaks
You'll notice that, the first time Snow Leopard boots up, you're not enjoying any sound along with that snazzy intro video. We've got one small, but very simple tweak to make to get sound up and running. Here's how it works:
Download the Kext Utility, then download this audio kext (a kext is kind of the Mac equivalent of a driver) and unzip it to your Desktop. Once you've got both in front of you, drag and drop the ALC889.Fix.kext file onto the Kext Utility. You'll be prompted to enter your password, so go ahead and do that when you're prompted.
Once the Kext Utility finishes running, open up Disk Utility (/Applications/Utilities/Disk Utility.app). Once it loads up, (1) click on your Snow Leopard drive (mine's called Hack Leopard), then (2) click Repair Disk Permissions.
Once Disk Utility finishes repairing your disk permissions, just restart. After your computer reboots, your audio should be working like a charm. (If not, open up Sound in your System Preferences and try changing the Output device.)
As things stand on your system right now, you need to have your thumb drive plugged in every time you reboot in order to load the bootloader that allows your Hackintosh to load OS X. There are certain benefits to this (for example, right now you could quite likely unplug this hard drive from your Hackintosh, plug it into a Mac Pro, and it would work just fine), but it can also be a bit of a hassle. At this point, though, you can load the bootloader and other necessary components onto the Snow Leopard hard drive and change that drive to your primary boot drive in your BIOS. All you've got to do is head back to the step-by-step bootloader guide above and repeat every step, except this time you're applying each step to your hard drive rather than your thumb drive.
Congratulations! You've Got a Fully Functional Hackintosh
"But for realz," you ask, "does it actually work well?"
I've been using one or another Hackintosh as my main computer for two years now, and while I've run into the occasional bump in the road, they've generally run extremely well. In fact, things just seem to keep on getting better and better, and the current build I'm running (the one I walked you through above) feels like the fastest, most stable build to date.
That's not to say that you won't experience an occasional kernel panic—you may very well. But I get crashes on my MacBook Pro, too, and I've never felt that my current Hack Pro has any more problems than any other proper Mac I've used on a regular basis. That may seem a bit crazy, but it's true.
As for upgrading—often, you'll be able to upgrade your Hack Pro without any problems. That said, it's something you normally need to check on beforehand, and you should take all of the upgrade precautions before giving it a go.
I'm planning on letting readers know how my Hack Pro handles various 10.6.x updates shortly after they happen, though, and if it requires a little extra work, I'll show you how to handle it.
Let's hear your thoughts—whether you've dabbled in the world of Hackintosh, are interested in doing so, or just think it's plain crazy—in the comments.
Adam Pash is the editor of Lifehacker; he loves a good hack, cherishes his Macintosh, and craves a Mac Pro, so building a Hack Pro was a perfect fit. His special feature Hack Attack appears on Lifehacker. Subscribe to the Hack Attack RSS feed to get new installments in your newsreader.
* OS X boots in a different way than, say, Windows, using a boot tool called EFI (Extensible Firmware Interface). On store-bought Macs, EFI is loaded on the hardware by default (in fact, in place of the standard BIOS most of us are used to). In order to boot OS X on our non-factory Macs, we need to create our own custom path to EFI.
Huge thanks to stellarola, Onetrack, and weaksauce12 for all their help in getting me up to speed on installing Snow Leopard on a Hackintosh PC. The Hackintosh community is large and active, and they are awesome.
youtube.com — Nearly a decade later, writer and director Troy Duffy is back with Boondock Saints 2. The MacManus brothers have been in deep hiding in the quiet valleys of Ireland, far removed from their former lives. When Word comes that a priest has been killed by sinister forces in Boston, they return to mount a violent and bloody crusade of justice.
Archaeologists say the wall formed part of the region's first fortifications
A 3,700-year-old wall has been discovered in east Jerusalem, Israeli archaeologists say.
The structure was built to protect the city's water supply as part of what dig director Ronny Reich described as the region's earliest fortifications.
The 26-ft (8-m) high wall showed the Canaanite people who built it were a sophisticated civilisation, he said.
Critics say Israel uses such projects as a political tool to bolster Jewish claims to occupied Palestinian land.
Excavations at the site, known as the City of David, are in a Palestinian neighbourhood just outside the walls of Jerusalem's old city.
It is partly funded by Elad, a Jewish settler organisation that also works to settle Jews in that area.
Open to the public
The wall dates from a time in the Middle Bronze Age when Jerusalem was a small, fortified enclave controlled by the Canaanites, before they were conquered by the Israelites.
Its discovery demonstrated Jerusalem's inhabitants were sophisticated enough to undertake major building projects, said Mr Reich.
"The wall is enormous, and that it survived 3,700 years - this is, even for us, a long time," said Mr Reich, an archaeology professor at the University of Haifa.
The excavation team said the wall formed part of a structure that protected a passage from a hilltop fortress to a nearby spring - the area's only water source.
Israel's Antiquities Authority said the site would be open to the public on Thursday.
.
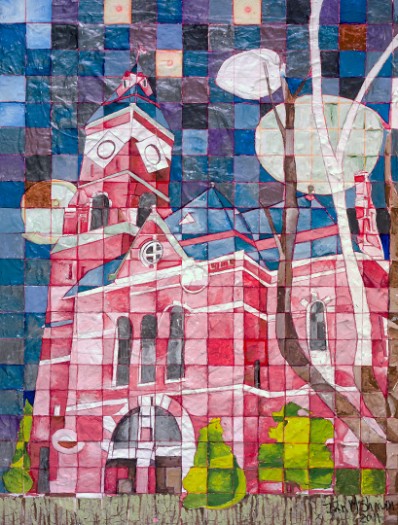
All you art collectors out there. Here is a chance to get a Giclee copy of some of Ian M Sherwin work. Ian is planning on doing a whole series of Marblehead, Massachusetts paintings. His work is amazing.




 Download the
 "But for realz," you ask, "does it actually work well?"


 .

 Posts

