Two weeks ago I detailed how to build a Hackintosh with Snow Leopard, start to finish, with a little Terminal work. If you're not comfortable with command-line hacking, you can now install Snow Leopard on your Hackintosh with just a few point-and-clicks.
So what's changed between my last guide and this one? In short, one of the incredibly helpful and generous people who helped walk me through the installation process last time was kind enough to wrap all the tedious Terminal work into one dead simple installer. Where two weeks ago I showed you how to prepare your thumb drive (and after that, hard drive) with a custom bootloader that allows you to boot into OS X on regular old PC hardware, now all you have to do is run a package, point it at the drive you want to prepare, and then let it take care of all the nitty gritty. It could not be more simple.
Now onto the revised process!
NOTE: Just like the last post, this guide is focused specifically on the hardware I suggested in the previous guide—specifically the motherboard. If you try following this guide on other hardware, there's a very good chance it won't work as advertised.
What You'll Need
Supported hardware. I laid out my list of supported hardware in my previous post here. It's not the only hardware that will work with OS X, but it's the only hardware that's guaranteed to work with this guide.
A USB thumb drive that's at least 8GB in size (I'm using this 16GB Corsair drive, but obviously any sufficiently sized thumb drive should do just fine.)
A copy of the Snow Leopard Install DVD. You can use the $29 "Upgrade" disc to install, even though this is a fresh installation. Note: If you feel like being completely honest, go ahead and buy the Mac Box Set-though, honestly, Apple's practically made it hard *not* to buy the fully functional install disc.
Another Mac to prepare your thumb drive. (You'll only need this other Mac for a few steps. I used my MacBook Pro, but you could also borrow a friend's for an hour or so, too.)
The EP45UD3P Snow Leopard install package. This package allows you to skip all the command line work in my last guide, and you can download it here.
Step One: Prepare Your Thumb Drive
In this step, you're going to format your thumb drive and then restore the Snow Leopard DVD image to the thumb drive because later we'll be installing Snow Leopard to your hard drive using this thumb drive rather than the DVD. "Why?" you ask. Because in order to boot the installer, we need to customize the disk image with some special helper files of our own.
I went into great detail on this process last time, so this time I'm just going to include the step-by-step video below (made by the same generous man who created the EP45UD3P Snow Leopard installer package). If you want to read the very detailed version for a thorough explanation of how to rip the Snow Leopard install DVD to a disk image and then restore that image to your thumb drive, go here. (Come back when you get to the "Semi-heavy Terminal work" warning. That's when you're ready for the new and improved easy part.)
Note: Watch the video in HD and fullscreen to get a closer look at everything that's happening.
As you can see in the video, after you restore the Snow Leopard install DVD to your thumb drive, all you've got to do is fire up the EP45UD3P Snow Leopard.pkg file (if you haven't already downloaded and unzipped it, you can grab it here), select your thumb drive, and, let the installer take care of all the dirty work that you previously had to do one line at a time in Terminal.
Once you've finished there, you're ready to set your BIOS and install Snow Leopard.
Step 2: Set Your BIOS
Before you can boot into or install OS X on your Hackintosh, you've got to make some small adjustments to your system BIOS (press Delete at system startup to tweak your BIOS settings). Rather than taking you step by step through every change you need to make, I've simply snapped a picture of the relevant BIOS screens and added some notes. Just click through these images and make sure your BIOS settings match up.
If you've made it this far, the hard part is over. Now it's time to install Snow Leopard, which—unlike what we've done so far—is extremely easy.
Make sure you've set the boot priority in your BIOS to boot from your thumb drive (you can see how in this pic), then simply plug your prepared thumb drive into your Hackintosh and power it up. Since screenshots aren't really an option—and since it's a fairly easy process—my install instructions come in video format:
The quick version goes like this: Boot into the Snow Leopard installer, format the hard drive you want to install Snow Leopard to (go to Utilities -> Disk Utility, then click on the drive, select 1 Partition, Mac OS X Journaled (Case-SensitiveUpdate: Several readers have suggested that case-sensitive formatting can cause problems with some applications, like Adobe's Creative Suite, so you may be better off sticking with plain old Mac OS X Journaled.), give it a name, and make sure GUID Partition Table is set in the Options. After you Apply the new partition, go back to the installer and install like normal to that drive. When you reboot after the install completes, press the arrow keys at the graphical boot menu and select the drive you just installed Snow Leopard to.
Two Last Tweaks
You could just stop there and be pretty happy at your new Hackintosh, but there are two little, easily performed tweaks you'll want to tackle to get everything in tip top shape: The first will get your sound fully working, and the second will allow you to boot into Snow Leopard without your thumb drive.
Tweak One: Snow Leopard should be up and running on your Hackintosh like a dream—with one exception: Sound isn't entirely working yet. You may notice that sound actually does work in some instances, but not all. In the old guide, you needed to install a custom audio kext (your Mac's equivalent to a driver); the setup has been slightly tweaked in this new method, so all you should actually need to do is open up the Sound preference pane in System Preferences (/Applications/System Preferences), click the Output tab, and change the output device to Built-in Line output (I haven't tested with digital out, but it should work fine in theory).
Tweak Two: At this point, in order to boot to your newly installed Snow Leopard installation, you need to have your thumb drive plugged in so it loads the custom bootloader, from which you can select your new Snow Leopard hard drive. To install the custom bootloader to your hard drive (so you no longer need the thumb drive to boot), again download the EP45UD3P Snow Leopard.pkg zip file and run it, but this time, instead of choosing to install the package to your thumb drive, select the hard drive you've installed Snow Leopard to. Once the installer completes, you'll no longer need your thumb drive plugged in to boot into Snow Leopard.
Congratulations! You've Got a Fully Functional Hackintosh—the Easy Way
Where the method I covered previously required a good amount of time and care in Terminal, this new and improved method is a breeze, and it works even better. (Sound works out of the box without any custom kexts, for example.)
It's also worth noting that you can go ahead and upgrade to OS X 10.6.1 without any problems.
If you've given the Hackintosh route a try since my first post, let's hear how it's been working out for you in the comments. If this extra ease-of-installation was just what the doctor ordered, go grab the parts listed in the last post and get ready for a fun weekend.
Adam Pash is the editor of Lifehacker; he loves a good hack, enjoys his Macintosh, and craves the power of a Mac Pro, so building a Hack Pro was a perfect fit. His special feature Hack Attack appears on Lifehacker. Subscribe to the Hack Attack RSS feed to get new installments in your newsreader.
Two years ago, I detailed how to build a Hackintosh for under $800—then covered how to do the same with less hacking. Now that Snow Leopard's out, we're revisiting the Hackintosh, building a Hack Pro from scratch for roughly $900.
For folks eager to try a Mac but never wanted to plunk down the high price tag to get it, the Hackintosh—that is, a regular PC tweaked to run OS X—has always been an attractive option. That said, it's not something you should take on lightly unless you're willing—even enthusiastic—to build and maintain a PC entirely from scratch. I can't guarantee it'll be easy, but if you follow this guide step-for-step (it's exhaustive) and stick with the same (or at least roughly the same) hardware as I am, I can vouch for a rock solid system that also happens to cost a good deal less than you'd pay for a comparable Mac.
Price Comparisons
Most Hackintosh enthusiasts will say you shouldn't build a Hackintosh primarily to save money, as it's more than just an insert-disc-and-click install. Still, I always enjoy looking at the price differences between my Hackintosh and Apple's current offerings. At the moment, the cheapest Mac in the Apple store is a Mac mini sporting a 2.0GHz Core 2 Duo processor, 1GB of RAM, and a 120GB hard drive. For $300 more, I'm running a 3.0GHz Quad-Core processor, 8GB of RAM, a 1TB hard drive, and a damn saucy video card. I could have made this build much cheaper by skimping on hardware and still ended up with a great little machine, but I liked aiming for around the $800 price point from my last build—plus I really wanted to make it fly.
The most expensive iMac, by comparison, has only a 3.06GHz Core 2 Duo with 4GB of memory for $2,200 ($1,300 more than my build, but it is built into a monitor), while the cheapest Mac Pro has a single 2.66GHz Quad-Core processor, 3GB of RAM, and a 640GB hard drive—and it costs $2,500 ($1,600 more than mine, though it's a different and better processor and DDR3 rather than DDR2 RAM). In short, my $900 "Hack Pro" sports nearly as good or better hardware than any Mac that Apple sells short of the $3,300 8-Core Mac Pro (which can, incidentally, get more expensive, but it won't get much better).
The Hardware
You can find plenty of hardware capable of supporting OS X on a Hackintosh—there's no definitive build—but we're not going to go into that here. I've put together a list of hardware that I'm using and that I can guarantee will (or at least has) run Snow Leopard like a dream.
To make it easy, I've created my entire build as a wishlist over at Newegg. Unfortunately, Newegg's not cooperating with me when I try to make it public right now, so here's a link to everything I bought:
10/ 100/ 1000/ 2000Mbps PCI Copper Gigabit Network Adapter (The motherboard has onboard Ethernet, naturally, but this particular board has some problems with onboard in the Hackintosh world. Luckily, Ethernet cards are extremely cheap.)
The Build
Rather than detail every step necessary to put the actual pieces of your new computer together (this guide already reads like the Bible as is), I'm just going to point you to our first-timer's guide to building a PC from scratch. Do your building, make sure everything's booting up as it should be (i.e., you can boot the computer to the point where it does nothing, because you have nothing installed on it), then let's move on.
What Else You'll Need
Assuming you've purchased all the necessary parts for your build (linked above), you'll still need a few other things before you get started:
A USB thumb drive that's at least 8GB in size (I'm using this 16GB Corsair drive, but obviously any sufficiently sized thumb drive should do just fine.)
A copy of the Snow Leopard Install DVD. You can use the $29 "Upgrade" disc to install, even though this is a fresh installation. Note: If you feel like being completely honest, go ahead and buy the Mac Box Set—though, honestly, Apple's practically made it hard *not* to buy the fully functional install disc.
Another Mac to do some Terminal work on. (You'll only need this other Mac for a few steps. I used my MacBook Pro, but you could also borrow a friends for an hour or so, too.)
Step One: Prepare Your Thumb Drive
We're going to be installing Snow Leopard to your Hackintosh from your thumb drive rather than from the Snow Leopard install DVD, since in order to run the installer on your PC to begin with, you'll need to slightly customize the way the installer is loaded. (More specifically, we'll be loading a custom bootloader onto the thumb drive that will make booting into the install work like a charm.*)
So first things first: You need to format your thumb drive and then turn your Snow Leopard install disc into a disk image on your desktop. Here's how to do it:
Launch the Disk Utility application on your borrowed Mac (located at /Applications/Utilities/Disk Utility)
Format and partition your thumb drive: Insert your thumb drive; after a second, it should show up in the Disk Utility Sidebar. When it does, (1) click on it, then (2) click on Partition. (3) Choose 1 Partition from the Volume Scheme, (4) give it a name (I called my HackintoshInstall) and select Mac OS Extended (Case-sensitive, Journaled) from the Format drop-down. Now—and this is important—(5) hit the Options button and make sure GUID Partition Table is selected as the partition scheme. Once you've made sure to set all the appropriate settings, just (6) click Apply and Disk Utility will get to partitioning your thumb drive.
Copy the Snow Leopard Install DVD image to your hard drive: In the following step we'll be turning your thumb drive into a Snow Leopard Install drive, but before we do that, we need to get the installer off your DVD and onto your hard drive. To achieve this, insert the Snow Leopard DVD. When it shows up in the Disk Utility sidebar, (1) click on it, then (2) click New Image in the Disk Utility toolbar. Choose where you want to save it (for the sake of convenience, I put it on my Desktop), then click the Save button. Now go grab yourself a cold drink. This will take some time. When it finishes, move on to the next step.
Restore the Snow Leopard Install disk image to your thumb drive: Now, in Disk Utility, (1) click on HackintoshInstall (or whatever you called your partitioned thumb drive) and (2) click on Restore. (3) Drag and drop Mac OS X Install DVD.dmg from the sidebar to the Source field, then (4) drag and drop your thumb drive from the sidebar to the Destination field. Now simply (5) click on Restore and enter your password when prompted. Disk Utility will take everything on the Snow Leopard Install DVD and restore that image to your thumb drive—since, like I said above, we'll be installing Snow Leopard from our thumb drive instead of the DVD. Again, go grab yourself another drink; this will take a few minutes. When it finishes, your thumb drive has basically been turned into a Snow Leopard installation drive.
As I said earlier, the thumb drive needs a little finesse before you can boot the Snow Leopard installer on your PC hardware; let's apply that finesse now.
Warning: Semi-heavy Terminal work ahead. It's not that difficult, and I've gone into a lot of detail to make it as easy to follow along as possible, but if you're not at least a little comfortable with the command line, it may make you pretty uncomfortable. Beg or borrow a command line geek for an afternoon, if needed.
Make sure your thumb drive is still plugged in, open Terminal (/Applications/Utilities/Terminal) and type in:
diskutil list
We're interested in two pieces of information here. The first is the root identifier for your thumb drive (mine looks like disk2, as you can see in the screenshot). The second is the specific identifier for the portion of the thumb drive that contains the Snow Leopard installer. (Again, see the screenshot.) In my case, the first is disk2 and the second is disk2s2. Yours may vary depending on how many disks are on your system. Copy your identifiers down somewhere. We'll need them later.
Head to the Chameleon homepage, find the Latest Releases section of the site's sidebar, and download the latest version of Chameleon. (As of this writing, it's Chameleon-2.0-RC2-r640.) Uncompress the download and move the Chameleon folder to someplace that's easy to access. I'm putting it on my Desktop.
Now, in Terminal, cd to the i386 folder of the Chameleon folder. On my Mac, the command looks like this:
(1)
cd /Users/adam/Desktop/Chameleon-2.0-RC2-r640-bin/i386/
Yours should look similar if the Chameleon folder is on your Desktop, except your username should replace mine. (Quick shortcut: In Terminal, type cd , then drag and drop i386 folder inside Chameleon-2.0-RC2-r640 to Terminal.) Hit Enter.
You're going to be running a couple of Terminal commands that will use Chameleon to make your thumb drive friendly to booting up the OS X installer. They are, as follows:
(2)
sudo fdisk -f boot0 -u -y /dev/rdisk2
IMPORTANT: On your computer, replace rdisk2 with whatever you copied down above. In my case, the thumb drive's root identifier was disk2, so /dev/rdisk2 is as it should be.
After you type in that command and hit Enter, you'll need to enter your user password to execute it. Do so, then execute the following command, again paying special attention to the disk identifier we took note of above:
(3)
sudo dd if=boot1h of=/dev/rdisk2s2
IMPORTANT: As I noted, my Snow Leopard partition was disk2s2, so that command is right for me. You should replace the disk2s2 portion of the command with whatever you noted as the portion of your thumb drive that contains the Snow Leopard installer.
Now we're going to place an awesome, custom EFI bootloader on your thumb drive that lets us load into the installer (and into Snow Leopard in general). So first, head over to netkas.org and download the bootloader from the bootloader link. Make sure you download it somewhere convenient. (Again, I've just downloaded it to my Desktop.)
Now head back into Terminal, where we're going to copy the boot file to your thumb drive. (One might think that you could just do this using Finder via drag-and-drop, but in this case, doing it via Terminal is necessary.) So, in Terminal, your command should look similar to this:
The easiest way to do this is simply type in sudo cp , (1) drag and drop the boot file into Terminal, then (2) drag and drop your mounted thumb drive from the desktop into Terminal. (The drag-and-drop method is a quick Terminal trick that pastes the full path to each file or directory.) After that, simply hit Enter. (Enter your password if necessary.)
I know it seems like we've already run a marathon, but you've got one last step and then it's relatively smooth sailing from here on. Download Extra.zip, unzip the file, and then drag and drop the Extra folder into your thumb drive. Nothing fancy, a simple drag and drop with your trusty old mouse will do. Once you've done that, open up your thumb drive and verify that it looks something like the screenshot below. (Notice the Extra folder, the boot file, and the OS X installer.)
Take a deep breath. By this time, you've completed all the hard work. Now it's time to boot up your machine, tweak your BIOS settings so they're ready for your OS X install, and then it's smooth sailing.
Step 2: Set Your BIOS
Before you can boot into or install OS X on your Hackintosh, you've got to make some small adjustments to your BIOS. Rather than taking you step by step through every change you need to make, I've simply snapped a picture of the relevant BIOS screens and added some notes. Just click through these images and make sure your BIOS settings match up.
If you've made it this far, the hard part is over. Now it's time to install Snow Leopard, which—unlike what we've done so far—is extremely easy.
Make sure you've set the boot priority in your BIOS to boot from your thumb drive (you can see how in this pic), then simply plug your prepared thumb drive into your Hackintosh and power it up. Since screenshots aren't really an option—and since it's a fairly easy process—my install instructions come in video format:
The quick version goes like this: Boot into the Snow Leopard installer, format the hard drive you want to install Snow Leopard to (go to Utilities -> Disk Utility, then click on the drive, select 1 Partition, Mac OS X Journaled (Case-Sensitive), give it a name, and make sure GUID Partition Table is set in the Options. After you Apply the new partition, go back to the installer and install like normal to that drive. When you reboot after the install completes, press the arrow keys at the graphical boot menu and select the drive you just installed Snow Leopard to.
A Few Final Tweaks
You'll notice that, the first time Snow Leopard boots up, you're not enjoying any sound along with that snazzy intro video. We've got one small, but very simple tweak to make to get sound up and running. Here's how it works:
Download the Kext Utility, then download this audio kext (a kext is kind of the Mac equivalent of a driver) and unzip it to your Desktop. Once you've got both in front of you, drag and drop the ALC889.Fix.kext file onto the Kext Utility. You'll be prompted to enter your password, so go ahead and do that when you're prompted.
Once the Kext Utility finishes running, open up Disk Utility (/Applications/Utilities/Disk Utility.app). Once it loads up, (1) click on your Snow Leopard drive (mine's called Hack Leopard), then (2) click Repair Disk Permissions.
Once Disk Utility finishes repairing your disk permissions, just restart. After your computer reboots, your audio should be working like a charm. (If not, open up Sound in your System Preferences and try changing the Output device.)
As things stand on your system right now, you need to have your thumb drive plugged in every time you reboot in order to load the bootloader that allows your Hackintosh to load OS X. There are certain benefits to this (for example, right now you could quite likely unplug this hard drive from your Hackintosh, plug it into a Mac Pro, and it would work just fine), but it can also be a bit of a hassle. At this point, though, you can load the bootloader and other necessary components onto the Snow Leopard hard drive and change that drive to your primary boot drive in your BIOS. All you've got to do is head back to the step-by-step bootloader guide above and repeat every step, except this time you're applying each step to your hard drive rather than your thumb drive.
Congratulations! You've Got a Fully Functional Hackintosh
"But for realz," you ask, "does it actually work well?"
I've been using one or another Hackintosh as my main computer for two years now, and while I've run into the occasional bump in the road, they've generally run extremely well. In fact, things just seem to keep on getting better and better, and the current build I'm running (the one I walked you through above) feels like the fastest, most stable build to date.
That's not to say that you won't experience an occasional kernel panic—you may very well. But I get crashes on my MacBook Pro, too, and I've never felt that my current Hack Pro has any more problems than any other proper Mac I've used on a regular basis. That may seem a bit crazy, but it's true.
As for upgrading—often, you'll be able to upgrade your Hack Pro without any problems. That said, it's something you normally need to check on beforehand, and you should take all of the upgrade precautions before giving it a go.
I'm planning on letting readers know how my Hack Pro handles various 10.6.x updates shortly after they happen, though, and if it requires a little extra work, I'll show you how to handle it.
Let's hear your thoughts—whether you've dabbled in the world of Hackintosh, are interested in doing so, or just think it's plain crazy—in the comments.
Adam Pash is the editor of Lifehacker; he loves a good hack, cherishes his Macintosh, and craves a Mac Pro, so building a Hack Pro was a perfect fit. His special feature Hack Attack appears on Lifehacker. Subscribe to the Hack Attack RSS feed to get new installments in your newsreader.
* OS X boots in a different way than, say, Windows, using a boot tool called EFI (Extensible Firmware Interface). On store-bought Macs, EFI is loaded on the hardware by default (in fact, in place of the standard BIOS most of us are used to). In order to boot OS X on our non-factory Macs, we need to create our own custom path to EFI.
Huge thanks to stellarola, Onetrack, and weaksauce12 for all their help in getting me up to speed on installing Snow Leopard on a Hackintosh PC. The Hackintosh community is large and active, and they are awesome.
Snow Leopard. Even the name seems to underpromise -- it's the first "big cat" OS X codename to reference the previous version of the OS, and the list of big-ticket new features is seemingly pretty short for a version-number jump. Maybe that's why Apple's priced the 10.6 upgrade disc at just $29 -- appearances and expectations matter, and there's simply not enough glitz on this kitty to warrant the usual $129.
But underneath the customary OS X fit and finish there's a lot of new plumbing at work here. The entire OS is now 64-bit, meaning apps can address massive amounts of RAM and other tasks go much faster. The Finder has been entirely re-written in Cocoa, which Mac fans have been clamoring for since 10.0. There's a new version of QuickTime, which affects media playback on almost every level of the system. And on top of all that, there's now Exchange support in Mail, iCal, and Address Book, making OS X finally play nice with corporate networks out of the box.
So you won't notice much new when you first restart into 10.6 -- apart from some minor visual tweaks here and there there's just not that much that stands out. But in a way that means the pressure's on even more: Apple took the unusual and somewhat daring step of slowing feature creep in a major OS to focus on speed, reliability, and stability, and if Snow Leopard doesn't deliver on those fronts, it's not worth $30... it's not worth anything. So did Apple pull it off? Read on to find out!
Installation
Interestingly enough, installation is one of the few parts of Snow Leopard that's dramatically different than previous versions of OS X. Unlike Microsoft's subtle nudges towards clean reinstallation of Windows 7, Apple's quite proud of the new 10.6 installer, which upgrades in place, quarantines incompatible apps and plugins in an "Incompatible Software" folder, and boots you right back up with little to no user effort. Seriously, you just stick in the disc, open the installer, enter your password and go -- that's it. You don't even have to reboot off the DVD. Of course, that made us a little uneasy, since we've always chosen Archive and Install to get a fresh OS, but you can't have cold feet here -- that option's been removed. We've been told it's now the default action behind the scenes, but the bottom line is that you have to trust the installer more than ever before -- and while we didn't have any major problems, it would be nice if we could force a new install of the OS without having to wipe a disk.
Installation itself took about 45 minutes on most of the machines we tried, although we did run into some snags once things were complete. We didn't have any problems with the more pristine MacBook Pros in our fleet, but one of our production machines is a cranky older iMac that's been in constant use for over two years without a system rebuild, and when it restarted the desktop pictures were all set to the defaults, the System Preferences app wouldn't launch from the Apple Menu, our MobileMe sync states were a little confused and Spotlight began reindexing all the external drives. Fixing these problems didn't take much, but if your machine is already acting up don't expect everything to go perfectly.
Other installation notes: We were promised 6GB of storage savings with 10.6, and Apple more than delivered -- we got anywhere from 10GB to a whopping 20GB back after installation. Rosetta is no longer installed by default, so if you're still rocking some legacy non-Universal apps you'll want to make sure and install it. Printer driver installation is much smarter, installing drivers only for those printers you've used in the past and printers that appear on your local network. We have no idea why Apple continues to insist on installing language translations by default, but they're much smaller now at 250MB.
Overall, installing Snow Leopard is just like installing any other major OS update: it works great, except when it doesn't. The process itself is fine (in fact, Apple has even built in some safeguards to let you pick up an install if your computer dies or is shut off half way through), but it's the little kinks you have to work out afterwards that can be tricky. If you haven't loaded up your system with hacks and tweaks chances are you'll be fine -- and if you're living on the edge, well, you're probably used to doing some extra work around upgrade time.
UI enhancements
Dock Expose
Previous OS X releases have brought major UI features like Expose and Dashboard with them, but there's nothing that major in Snow Leopard, although the various tweaks to the system are certainly appreciated. The biggest new feature is Dock Expose, which, as you'd expect, simply links Expose to the Dock. Holding down on an app's icon triggers Expose for that application's windows, and if you drag a file onto an app, you can then select which window you want to drop it into. It's definitely nice, but it's not earth-shattering. Here's a little video of it in action:
Stacks
We've never been huge users of the Stacks feature, but it's been tweaked and is much more usable in 10.6 -- as long as you're using grid view, which is now scrollable and offers the ability to drill down into folders just like a Finder window. All the other views are essentially the same -- and for whatever reason, dragging a file onto a stack icon doesn't open the stack, but instead opens a Finder window. While we're on the subject of folders in the dock, explain this nonsensical operation to us: command-clicking a stack icon doesn't open the folder (as you might expect), but instead pops open the enclosing folder. This counter-intuitive (and frankly frustrating) glitch has been around since Tiger -- and we have no idea why. Here's some video:
Finder file previews
We'll get to the big Finder changes shortly -- the Cocoa rewrite definitely improved things -- but the big UI tweak here is live file previews. That means you can watch a video, flip through a document, and generally peek at things without having to open an app or even hit the space bar for Quick Look. It's quite handy -- but again, not earth-shattering.
And... that's really it, as far as UI changes go. There's some other minor stuff, like better PDF text selection in Preview, new glass-look menus for the Dock, and alphabetical / per-app window organization choices in regular Expose when you press command-1 or command-2, but overall it's all extremely iterative and incremental -- welcome, to be sure, but not major. The new Finder, on the other hand, is both major and more than welcome.
Notable app changes
Finder
It's hard to explain how dramatically improved the Finder is now, because there's nothing externally different beyond those file previews and an icon-size slider in icon view. Suffice to say that the Cocoa rewrite has simply made things better: opening folders with thousands of items is instantaneous and scrolling is just as fast; network connections are snappier; and everything hums about with essentially zero lag. Sure, all the old Finder quibbles like inconsistent windows states and those damned .DS_Store files are still there, but trust us -- speed cures all ills. At least until we dump another couple thousand files into the system and slow things down again. QuickTime X
Like the Finder -- and, really, all things with Snow Leopard -- QuickTime X is a set of major changes wrapped in seemingly-minor interface tweaks. Although the big change for users is the "dark" interface with a title bar and controller strip that disappear during playback, underneath QuickTime has been entirely rewritten with hooks into modern OS X components like Core Video, Core Animation, and Core Audio. That doesn't mean much if you're just playing back an MP3 or a single video, but remember that QuickTime is more than an app -- it's the entire media layer for OS X, so the Snow Leopard rebuild will have big consequences down the line.
That said, there are some notable changes with QuickTime Player: there's a new screen recording tool (we made all the videos in this post with it), you can record right off your built-in iSight, and there's a new iPhone 3GS-like "Trim" tool to cut your videos fast.
That glossy title might come at a steep price for some of us -- at least at first glance. QuickTime Player X has certainly added some welcome new options for most, but for QuickTime 7 Pro users, things get a little confusing. If you've already got Pro on your system and do a straight install, you'll end up with the standard new QuickTime -- which means a lot of what you're used to will be missing. Hell, there isn't even a preferences dialog -- so say goodbye to presenting movies on a different monitor, or choosing a default full screen setting. The changes also means that you can't do quick'n'dirty edits by copy-and-pasting anymore (a favorite of Engadget editors), and export options have been reduced to presets for iPhone, iPod, Apple TV, MobileMe, and YouTube.
On top of that, some QuickTime-dependent apps seem like they need a rewrite to work correctly -- we couldn't get our Turbo.264 HD stick to function, and other QuickTime programs we tried seemed similarly stressed. Oh, and those screen recordings? They're encoded with some combination of H.264 and AAC audio that didn't play nice with Viddler out of the box -- and YouTube's uploader refused to load under Snow Leopard (we had a number of server errors), so we ended up uploading all these screencasts from a Windows machine. That may not be the case for all, but it was for us.
This won't be too much of an issue for users who are sticking with the basic QuickTime functionality, but for those of us who've become accustomed to Pro, it may be a little shock. Interestingly, Apple let us know that you can actually re-install QuickTime 7 Pro from the Snow Leopard disc (and from your Utilities folder, oddly), but if you hop right into a standard upgrade, it's amazingly easy to miss (we did on multiple systems).
Safari 4
If you're thinking of upgrading to Snow Leopard on day one, chances are you're already running Safari 4, since it's been available since June. The big changes in 10.6 are (obviously) 64-bit support, which here translates into much faster Javascript performance, and a new browser plugin architecture that runs individual plugins as separate instances. That means if a plugin like Flash crashes it won't take the whole app down with it, but sadly, we weren't able to test it -- for maybe the first time ever, we couldn't crash a browser. Hopefully our good luck rubs off on you. Exchange
By any measure, the most important new networking feature of Snow Leopard is built-in support for Microsoft Exchange in Mail, Address Book, and iCal. Since we're not heavy Exchange users, we won't go in-depth here -- our man Micheal Gartenberg has got you covered there -- but in our quick tests we found setup to be simple and the integration to be flawless. It's hard not to look at how well Snow Leopard integrates with Exchange and see exactly why Microsoft decided to kill Entourage and bring a proper version of Outlook to the Mac, but that's not happening for a long while -- until then, we think OS X users who need Exchange will be pretty happy.
Compatibility
Here's where it gets a little rough. Although Snow Leopard is ostensibly just a polish and repair job on Leopard, there've been enough changes under the hood so that plenty of things are likely to break -- or at least not play nice. As with the installation, if you're running a stock or close-to-stock system, you probably won't run into any problems, but if you've got a setup as tweaked as most of those in the Engadget labs, you're going to run into some issues.
The biggest compatibility-breaker is the demise of InputManager plugins in 64-bit apps, which means things like Unsanity's Application Enhancer framework and Safari plugins like 1Password and Glims are now broken (or at least not really playing nice). InputManager plugins have had a long and sordid history, with many claiming that they're unstable hacks built on what's essentially a security hole, but now that they're gone the only thing to worry about is how to replace all the utilities and applications that depend on them -- 1Password's developers are already beta-testing a 10.6-compatible update, but we have no idea how something like Chax will soldier on. If you've got a critical workflow that depends on an InputManager plugin -- and although that's always been a bad idea, we're sure some of you do -- then we'd advise holding off on the 10.6 upgrade until you work something out, since we saw some random freak-outs (like the one pictured) when we forced Safari into 32-bit mode to run 1Password.
We also noticed problems with old standbys like Growl, GrabUp and Skitch -- really clutch go-to applications that seemed to buckle under the 64-bit noise. Although we could start them in 32-bit mode, nothing seemed to work exactly right, and we're pretty sure we spotted Growl making off with a ton of free memory when we weren't looking. We also had trouble getting our Sprint Novatel U727 3G stick working, although our Verizon card was fine. Again, we're sure all of this is going to be updated, but if you're like us, the bugginess will prove maddening at times -- enough to make us consider waiting out the upgrade on some of our other machines.
There were some other head scratchers we saw on various systems, too. On a 17-inch unibody we were putting through the paces, the WiFi inexplicably has gone out and we have yet to get it working again. On a 15-inch, older generation MacBook Pro (3,1), Spotlight will only fetch search results in the dropdown -- results in a Finder window come up empty. More annoyingly, on two other, newer models we were testing with, Safari crashes out when booting into 32-bit mode -- meaning even Apple's workaround doesn't seem to... er, work.
That's the bad news, though. The good news is that almost all of our regular, non-plugin, non-third-party-framework, non-hack apps worked just fine. Office, Photoshop CS3 and CS4, Tweetie, Firefox 3.5, Ableton, Fluid -- you name it, it ran without a problem. Like we said, if you're running things close to stock you're going to be fine, but we tend to kit out our rigs with a ton of little hacks to really speed up our workflow, and that's the stuff that's broken in Snow Leopard. It's up to you to decide where on that line you fall before you commit to the upgrade.
Overall speed and stability
Compatibility with our various hackeriffic plugins aside, we found Snow Leopard to be just as stable and free from major hang-ups as Leopard. That cranky iMac we installed it on seemed to perk up a little, and while we don't think anything will ever make Firefox feel perfectly stable, we certainly didn't experience as many beachballs or other hangups while running 10.6. So yes, subjectively things seem fast and reliable, and the new Finder makes day-to-day usage seem positively zippy -- and the objective benchmarks tend to back that up.
As measured by XBench, Snow Leopard affects every Mac a little differently, but the basic outcome is the same: raw CPU performance goes up slightly, while the graphics numbers go down -- OpenGl performance in particular takes a big hit. We're not sure if this is due to our version of XBench not playing nicely with Snow Leopard or something else entirely, but we didn't notice any slowdowns while we actually worked -- or played a little casual CoD4. We're not deep into the benchmark scene, so we'd wait for some hardcore marks to hit before you race into fanboy battle with these numbers -- for now, just know that Snow Leopard certainly "feels" a little snappier than Leopard.
Wrap-up
Here's the thing about Snow Leopard, the single inescapable fact that hung over our heads as we ran our tests and took our screenshots and made our graphs: it's $30. $30! If you're a Leopard user you have virtually no reason to skip over 10.6, unless you've somehow built a mission-critical production workflow around an InputManager hack (in which case, well, have fun with 10.5 for the rest of your life). Sure, maybe wait a few weeks for things like Growl and MenuMeters to be updated, and if your livelihood depends on QuickTime you might want to hold off, but for everyone else the sheer amount of little tweaks and added functionality in 10.6 more than justifies skipping that last round of drinks at the bar -- hell, we're guessing Exchange support alone has made the sale for a lot of people. If you're still on Tiger, well, you'll have to decide whether or not you want to drop $130 on what's essentially a spit-shined Leopard, but if you do decide to spend the cash you'll find that the experience of using a Mac has changed dramatically for the better since you last upgraded.
Update: In the original version of the review we noted that QuickTime 7 Pro wasn't available for Snow Leopard. In fact, the software is available as a separate install on the disc itself and via the QuickTime 7 app in the Utilities folder.
.
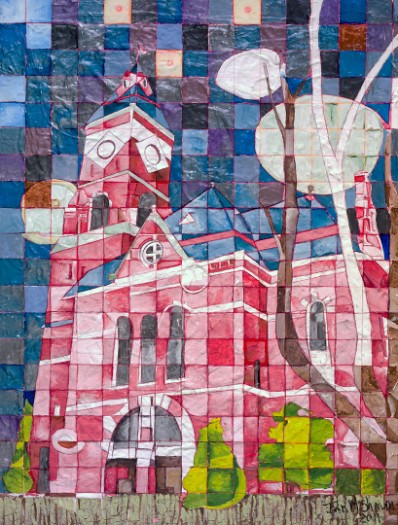
All you art collectors out there. Here is a chance to get a Giclee copy of some of Ian M Sherwin work. Ian is planning on doing a whole series of Marblehead, Massachusetts paintings. His work is amazing.


 Two weeks ago I detailed how to build a Hackintosh with Snow Leopard, start to finish, with a little Terminal work. If you're not comfortable with command-line hacking, you can now install Snow Leopard on your Hackintosh with just a few point-and-clicks.
 So what's changed between my last guide and this one? In short, one of the incredibly helpful and generous people who helped walk me through the installation process last time was kind enough to wrap all the tedious Terminal work into one dead simple installer. Where two weeks ago I showed you how to prepare your thumb drive (and after that, hard drive) with a custom bootloader that allows you to boot into OS X on regular old PC hardware, now all you have to do is run a package, point it at the drive you want to prepare, and then let it take care of all the nitty gritty. It could not be more simple.
 In this step, you're going to format your thumb drive and then restore the Snow Leopard DVD image to the thumb drive because later we'll be installing Snow Leopard to your hard drive using this thumb drive rather than the DVD. "Why?" you ask. Because in order to boot the installer, we need to customize the disk image with some special helper files of our own.


 Where the method I covered previously required a good amount of time and care in Terminal, this new and improved method is a breeze, and it works even better. (Sound works out of the box without any custom kexts, for example.)


 Download the
  "But for realz," you ask, "does it actually work well?"


 .
.

 Posts
Posts

