So you’ve finally decided to pony up the money and make the transition from your trusty point-and-shoot to a shiny new DSLR. Sure, those point-and-shoot photos look fine on Facebook, but if you’re going to make the transition to Flickr, you’ll want something with a little bit more versatility. Of course, DSLRs have automatic settings too, but hey, you spent all this money on a fancy camera, might as well learn to use the damn thing. But here’s the kicker, now you’ve got to contend with figuring out how to set the aperture, shutter speed, ISO and focus exactly right to get the optimal picture. It can be confusing enough to make the most confident snapper cower away to the automatic settings (not that we’ve ever been there or anything…).
A new website called CameraSim, however, seeks to quell those concerns with a simulated guide to shooting photos with a DSLR. The simple interface offers a viewfinder that mimics that of a typical camera, with the portrait of a young girl in a park holding a spinning pinwheel. The portrait includes a lot of bright colors that would be perfect for a vibrant photograph. The simple settings let the user play around with the lighting, distance, focal length and of course the ISO, aperture and shutter speed. By divesting the settings from the case of the camera, it lets users more comfortably toy with them while getting a larger representation of what the photo would look like after it’s been snapped. It defaults to shutter priority and also allows for aperture priority and manual, letting novices ween themselves from the automatic settings one frame at a time.
The website also includes a guide to each of the important settings and clearly defines them, making it accessible for photographers of any level.
I've been following a particularly interesting photographer on Flickr now for awhile, and the images he posts seem just unreal. But they're not!
Chickadee In Flight
They're incredible images of birds in flight, captured with a special camera set-up. While the photos look like paintings, they are indeed photos. You'll be amazed to see some of the movements of birds Gerry Sibell has been able to immobilize -- from hummingbirds battling wasps to goldfinches having mid-air standoffs.
Six weeks, and over 100 hours of footage shot on several Canon EOS 5D Mark IIs culminates in this remarkable, 4-minute time lapse of a Space Shuttle launch. [Air&Space via Planet5D]
Send an email to Mark Wilson, the author of this post, at mark@gizmodo.com.
Imagine if you could take professional-looking photos and create 3D product animations as easily as using the office copier. Ortery’s Photosimile 5000 system aims to bring that capability to the office by enabling even non-photographers to create high-quality images just by pressing a few buttons. The Photosimile 5000 is a PC-controlled desktop photography studio that integrates a light box, a DSLR camera, automated camera positioning, and specialized workflow software to simplify and automate business photography.
High-quality images are a powerful part of a company’s web presence and marketing collateral. Ortery's desktop studios are designed to make it easy to create professional-looking product photos for use on web sites, in print, and in email for daily business communications. Crisp, well lit images are essential for ecommerce websites, and the Photosimile 5000 adds the ability to produce 3D, 360-degree product animations as well.
The camera and light box connect to a PC using USB. The Photosimile 5000 software controls the studio, camera location, turntable movement, camera settings, picture taking, and post processing. Simply place an item inside the light box then compose your image using the preview, zoom, and crop commands in the software. With one click, the picture automatically downloads to the PC.
Often the difference between professional photography and amateur work is the lighting. The Photosimile 5000 starts by providing consistent, even lighting for shadow-free images and accurate color. The system uses four daylight bulbs providing 6500K illumination. The Photosimile 5000 also includes a Canon DSLR mounted on a mechanical track. You control the position, tilt, and zoom from the PC. The subject of your photo sits on an Ortery turntable, which the company also offers separately. For 360-degree imaging, the camera position is controlled automatically. The Photosimile can accommodate objects up to roughly 22in. (56cm) on each side. For 3D images the maximum size is somewhat smaller.
The Photosimile 5000 synchronizes the position of the turntable and camera to photograph objects from multiple angles in one or more planes. The combination of the turntable and the mechanical track allow the Photosimile 5000 to shoot up to 72 pictures per 360-degree rotation, at nine unique angles from 0 to 90 degrees. The resulting images can be automatically stitched together to create 360-degree product animations. These 3D views can be saved as GIF or Flash files, or exported to Ortery’s Real3D format. Real3D allows you to compose 3D Silverlight animations with mouse control and zoom capabilities. Ortery says the software can combine images to create 360-degree spherical or hemispherical or animations.
The Photosimile 5000 software controls every aspect of the studio including the camera settings, the camera positioning, turntable movement, picture taking, and image post-processing. The software displays a real-time live preview while you compose your picture with the preview, zoom, and crop controls. The software also provides a complete workflow for annotating, masking, and batch processing files including naming, resizing, watermarking, and saving.
Although the system was unveiled in 2008, Ortery recently announced that the Photosimile 5000 is now shipping. Ortery doesn't list pricing, but at least one dealer on the Internet lists the Photosimile at around US$17000.
For more information and some cool 3D samples, visit Ortery technologies at ortery.com.
Here's what you need to know to capture the excitement of a summer fireworks display.
Dave Johnson, PC World
For the photographer, winter certainly has its share of iconic subjects, such as Christmas trees, snowmen, and icicles hanging from a roof. But there's nothing quite like the excitement of shooting summertime fireworks. Done right, fireworks photos are dynamic and colorful, and they convey a sense of action better than almost any other kind of still image. Read on to learn how to capture some exciting fireworks photos of your own this summer.
Though photos of fireworks look impressive, you don't need specialized gear to get good results. You can use almost any digital camera to capture fireworks, as long as it offers either some degree of manual exposure control (so that you can dial in the right ISO, aperture, and shutter speed settings) or a fireworks scene mode designed to do the work for you.
Even compact digital cameras can meet the challenge. The Fujifilm Finepix F200 EXR shown here, for example, hits the sweet spot for portability and simplicity--it's a superb compact point-and-shoot that, when set to fireworks mode and stabilized to minimize image shake, can take some excellent fireworks shots.
...But a Digital SLR Is Best
Compact cameras eschew features for portability, however. If you like to tinker with your exposure settings, consider an advanced point-and-shoot like the Canon PowerShot SX10 IS. It has a convenient swiveling LCD for shooting unusual angles, such as over the top of a crowd or low down on the ground. A wealth of exposure options let you dial in the one-touch fireworks mode or take more control with shutter priority, aperture priority, and manual exposure settings.
If you have a choice, though, I recommend enlisting a true digital SLR. Digital SLRs tend to generate less noise in the lengthy exposures you'll need to capture fireworks, and they have advanced features such as manual exposure control and external shutter release to minimize shake when you're taking the photo. The Nikon D90 (pictured here), for example, is a favorite not just because it was the first digital SLR to incorporate high-definition video recording, but also because it provides excellent image quality, Live View mode, and face detection for those times when you’re not shooting fireworks.
Stabilize Your Camera
The most important rule for shooting fireworks: Use a slow shutter speed so that you can record those dramatic, colorful light trails as they explode through the sky. But no matter whether you're using a point-and-shoot or a high-end digital SLR, you'll need some sort of support to capture a sharp image, free from the blur that results when you hold a camera in your hands.
A simple, inexpensive, and lightweight tripod is all you need. Keep the tripod head loose so that you can quickly move it around to frame the exploding fireworks, while the tripod legs prevent jiggling.
If you don't want to haul even a compact tripod around, consider using a monopod--since it has just one leg instead of three, it won't be as steady as a tripod, but it can be a reasonable compromise. You could also prop your camera on a solid surface. Some photographers like gadgets such as The Pod (essentially a bean bag with a tripod mount in the top) for steadying the camera on rocks, fences, and other platforms.
Hands Off
You should also avoid touching the camera when the exposure starts, so you don't jiggle it and blur the photo. You could try to use the camera's self-timer to trigger the exposure, but you would have to trigger your exposure in advance to anticipate the best fireworks moment. A better solution is to invest in a wireless remote or a shutter release cable, both of which let you take the photo without touching the camera.
Go Automatic
If your compact camera or advanced point-and-shoot has a fireworks mode, enable it. This mode automatically adjusts the camera's settings for a nighttime exposure. Want to know what's going on behind the scenes? On most cameras, the fireworks mode will turn the flash off, set focus to infinity, disable exposure compensation, and lower the ISO. For the most part, I find that a preset fireworks mode achieves good results for simple shots.
No Fireworks Mode? No Problem
Some point-and-shoots that lack a fireworks mode may still permit you to adjust the settings. Here are some good settings to try, if your camera allows.
Low ISO: Set the camera to its lowest ISO setting to minimize digital noise.
Focus on infinity: Turn off automatic focus and set the camera's focus to infinity so that it doesn't search helplessly for a subject in the dark. Don't have a manual focus control? Use the camera's landscape mode, which also sets the focus to infinity; the low light will encourage the camera to shoot at a slow shutter speed and capture the light trails.
Set the aperture: Dial in an f/stop somewhere between f/8 and f/16. That will help prevent overexposing the scene and avoid light "blooms" coming from the explosions in the sky.
Slow down the shutter: Pick a value between 1 second and 16 seconds for your shutter speed. The longer the exposure, the more fireworks you'll capture in the same frame, and the longer your light trails will be. For really long exposures try covering the lens with your hand or the lens cap between bursts to avoid overexposing the picture.
If you have a digital SLR, you'll have an easier time--and more options--when setting up your camera for fireworks.
In a nutshell, you'll want to dial in the lowest ISO, throw the camera into full manual mode, choose a small aperture opening (try starting at f/8), and pick a slow shutter speed with an exposure time of between 1 and 4 seconds. After you take your first few pictures, review them to see if you're getting realistic color. If the bright blue, orange, and red fireworks all look kind of white, you should use the same exposure time but close the aperture a bit and try again. That means changing your f/8 setting to f/11 or perhaps f/16. If the fireworks are too dim, open the aperture to f/5.6 or f/4.
Most SLRs have a bulb mode that leaves the shutter open for as long as you hold down the shutter release, giving you total control over the exposure. When the fireworks launch, press the shutter release to start the exposure. Hold the button down until after the fireworks have bloomed, several seconds later. If you go for superlong exposures, you should cover the lens between fireworks.
While you might be tempted to zoom in to get close-ups of the action, I recommend that you use the wider end of your lens's range--or, if you're using a digital SLR, switch to your wide-angle lens. You'll be able to capture more fireworks in a shot and even frame the action against a skyline or other recognizable objects in the foreground.
Of course, you can experiment by changing your zoom range throughout the evening. Just remember that if you zoom in too tightly, you'll have trouble knowing exactly when and where the fireworks are going to do their thing, and you'll end up missing the action.
As you prepare for summer fireworks, remember that capturing the action is often more art than science. Experiment with a range of shutter speeds and aperture settings over the course of the event. If the weather is uncooperative, take advantage by incorporating umbrella-covered spectators into the scene. And don't forget that your photo editing program's cropping tool can sometimes bring a distant fireworks blast front and center, turning a mediocre shot into a keeper.
(For more expert advice on digital photography, cameras, and image editing, see our Digital Focus blog.)
If hiding in the dirty bushes to stalk your ex is cramping your style (and ruining all your black outfits), then perhaps this Super-Secret Spy Lens extension is just what you need.
The extender, which is basically a $50 periscope that attaches to your SLR lenses by way of an adapter, allows you point that zoom lens at a "fake out" object, and then shoot pics of the real subject to your immediate right or left. The extender even swivels 360 degrees, in case your subject is a slippery one, and is able to dance about your periphery to your right and left with relative ease. Actually, if that's the case, the person may have gotten wise to you, and the police could be coming soon. In any event, the pics will look fantastic.
More seriously, amateur and professional photogs alike understand that people just look better in photos when they don't know they're being photographed. This adapter, while somewhat creepy (just hit the link and watch the woman snap a few pics in public), gets that job done. [Photojojo]
.
All you art collectors out there. Here is a chance to get a Giclee copy of some of Ian M Sherwin work. Ian is planning on doing a whole series of Marblehead, Massachusetts paintings. His work is amazing.


 If hiding in the dirty bushes to stalk your ex is cramping your style (and ruining all your black outfits), then perhaps this
  More seriously, amateur and professional photogs alike understand that people just look better in photos when they don't know they're being photographed. This adapter, while somewhat creepy (just hit the link and watch the woman snap a few pics in public), gets that job done. [
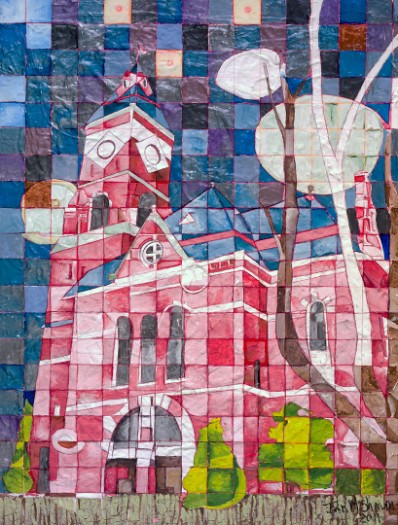 .
.

